If you have ever created an animation in Source Filmmaker, you’ve probably come across the term SFM compile. Whether you’re producing a short cinematic, creating a game trailer, or simply experimenting with animation, understanding the compilation process is essential. A successful compile transforms your project into a polished video that you can share on YouTube, social media, or with your team.
Many beginners focus entirely on animation while overlooking the importance of rendering and compiling. However, even the best animation can lose its impact if the compile settings are incorrect. Issues like blurry visuals, poor lighting, low frame rates, or oversized files often result from an improper compilation process.
This guide explains everything you need to know about SFM compile, from understanding what it means to choosing the best settings, solving common problems, and producing professional-quality videos. Whether you’re a beginner or an experienced Source Filmmaker user, this article will help you achieve better results.
What Is SFM Compile?
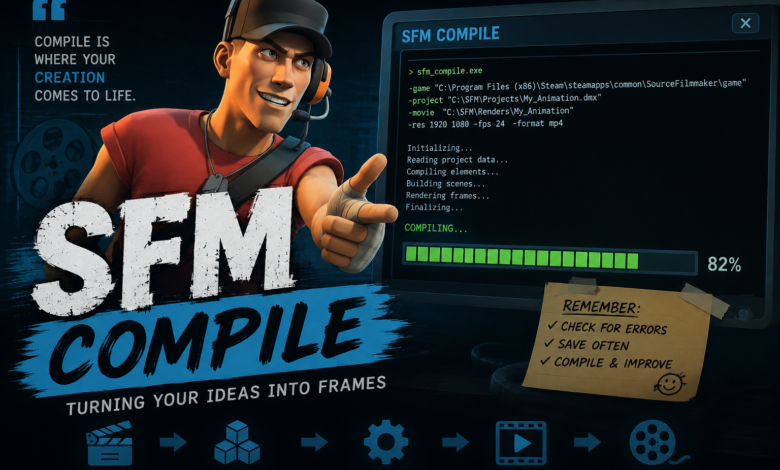
SFM compile refers to the process of converting your Source Filmmaker project into a finished video or image sequence. During this process, the software calculates every frame of your animation, applies lighting, shadows, effects, camera movements, and textures, then exports everything into your chosen format.
Unlike real-time previews, the compile process produces a final-quality render. This ensures your animation looks exactly as intended without the dropped frames or reduced quality often seen during editing.
The compilation stage is the final step before publishing your work. Once completed, your project becomes a shareable media file that can be uploaded to streaming platforms, edited further in video software, or archived for future use.
Why SFM Compile Is Important
Many new creators underestimate how much the compile process affects the final result. A carefully animated project deserves an equally careful export.
Compiling correctly preserves image quality, keeps frame timing accurate, and ensures all lighting and particle effects appear as intended. Without proper settings, shadows may flicker, textures can appear blurry, or the finished video may stutter during playback.
Professional creators spend time adjusting compile settings because they understand that rendering quality directly influences how viewers perceive the finished animation. A well-compiled video appears cleaner, sharper, and far more polished.
How the SFM Compile Process Works
The compilation workflow begins once your animation timeline is complete. Before exporting, it is important to review every camera angle, lighting setup, animation sequence, and sound effect.
After selecting the export option, Source Filmmaker processes every individual frame. Depending on your animation’s complexity, this can take anywhere from a few minutes to several hours.
The software then combines all rendered frames into your chosen output format. Some creators export directly to video, while others prefer rendering image sequences for additional editing in software such as Adobe Premiere Pro or DaVinci Resolve.
Best SFM Compile Settings
Choosing the right settings depends on your intended audience and platform.
For YouTube content, exporting at 1920×1080 resolution with a frame rate of 60 FPS usually provides excellent quality. Higher resolutions like 1440p or 4K can offer even sharper results but require significantly longer render times.
Compression settings also matter. Excessive compression reduces image quality, while minimal compression creates very large files. Finding the right balance helps maintain detail without consuming unnecessary storage.
Lighting and anti-aliasing settings should also be checked before compiling. Higher-quality settings reduce jagged edges and improve the overall appearance of your animation.
Tips for Faster SFM Compile Times
Rendering can become time-consuming, especially for longer projects. Fortunately, there are several ways to speed up the process.
Close unnecessary applications before compiling. This frees up system memory and allows Source Filmmaker to use more of your computer’s resources.
Lower preview settings while editing, then switch to higher settings only for the final export. This approach improves workflow without sacrificing output quality.
Keeping graphics drivers updated also improves rendering stability and may reduce compile times on supported hardware.
If your project includes extremely detailed particle effects or high-resolution textures, consider simplifying scenes that don’t require maximum detail.
Common SFM Compile Problems
Every creator eventually encounters rendering issues. Fortunately, most have straightforward solutions.
One common problem is missing textures. This usually happens when Source Filmmaker cannot locate the required files. Verifying asset locations before rendering prevents this issue.
Another frequent problem involves lighting errors. If shadows appear incorrect, rebuilding lighting or checking light placement often resolves the issue.
Some users also experience crashes during compilation. These are commonly caused by insufficient memory, corrupted project files, outdated graphics drivers, or scenes that exceed available system resources.
Occasionally, compiled videos may appear darker or brighter than expected. Testing short renders before exporting an entire animation helps identify these issues early.
Image Sequence vs Video Export
Many experienced animators prefer exporting image sequences rather than a single video.
An image sequence saves every frame individually. If rendering stops unexpectedly, you only need to continue from the last completed frame instead of starting over.
Image sequences also preserve maximum image quality because each frame is stored separately without video compression. This makes them ideal for professional editing and colour correction.
Direct video exports are faster and require less storage space, making them a practical choice for smaller projects or quick previews.
Optimising Your Animation Before Compiling
Good preparation makes the compilation process much smoother.
Review your timeline carefully to ensure animations are complete and there are no accidental camera movements or missing keyframes.
Check every texture, particle effect, and model before rendering. Small mistakes become much more noticeable once the project has been fully compiled.
Preview important scenes several times. Watching your animation from beginning to end often reveals timing issues that are easy to miss while editing individual shots.
Organising project files into clearly labelled folders also helps prevent missing assets and simplifies future revisions.
Advanced SFM Compile Techniques
As your experience grows, you’ll likely begin using more advanced workflows.
Many professional creators render image sequences and complete colour grading in external editing software. This approach offers significantly more control over contrast, brightness, saturation, and visual effects.
Some artists also render multiple passes, separating lighting, ambient occlusion, depth information, and particle effects. These passes can then be combined during post-production for a cinematic finish.
High-end productions often involve multiple rendering tests before the final compile. Running small sample exports allows creators to identify lighting issues, animation errors, or compression artefacts before committing to a full render.
Best Practices for High-Quality SFM Compile Results
Consistency is one of the biggest factors in producing professional-looking animations.
Save your project frequently throughout development to reduce the risk of data loss. Maintaining backup versions also allows you to revert if something goes wrong.
Keep your Source Filmmaker installation updated and organise custom assets carefully. Missing or outdated files are among the most common causes of compile failures.
Avoid rushing the final export. Spending a few extra minutes reviewing your project can save hours of re-rendering later. Testing a short section before compiling the entire animation is a habit that many experienced creators recommend.
Conclusion
Understanding SFM compile is one of the most valuable skills for anyone using Source Filmmaker. While animation often receives most of the attention, the compilation process determines how your work ultimately appears to viewers. By choosing the correct settings, preparing your project carefully, and addressing common issues before exporting, you can create animations that look polished and professional. Whether you’re producing cinematic shorts, gaming content, tutorials, or creative projects, mastering SFM compile will help you achieve higher-quality results while avoiding many of the problems that frustrate new creators. As you continue practising, you’ll develop a workflow that balances rendering speed, visual quality, and efficient project management, allowing every animation you produce to reach its full potential.
Frequently Asked Questions
1. What does SFM compile mean?
SFM compile is the process of rendering and exporting a Source Filmmaker project into a finished video or image sequence.
2. Why does SFM compile take so long?
Rendering time depends on your computer’s hardware, project complexity, lighting, particle effects, textures, and chosen export settings.
3. Should I export an image sequence or a video?
Image sequences provide the highest quality and are easier to recover if rendering is interrupted. Video exports are quicker and more convenient for smaller projects.
4. What resolution is best for SFM compile?
For most creators, 1920×1080 at 60 FPS offers an excellent balance between quality and file size. Higher resolutions such as 1440p or 4K are suitable for more demanding projects.
5. How can I speed up SFM compile?
Close unnecessary programs, keep your graphics drivers updated, simplify complex scenes where possible, and use lower preview settings during editing before switching to higher-quality settings for the final export.
You May Also Read; Tech Hacks PBLinuxGaming